3D Printer6

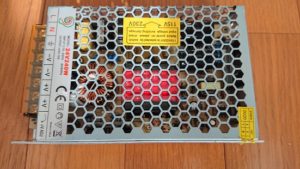
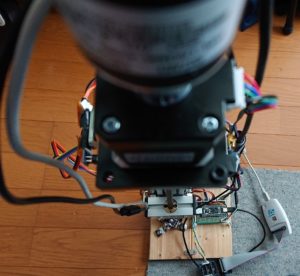
電源を交換し、3D Printerは、復旧しました。
以下の電源で使用しました。
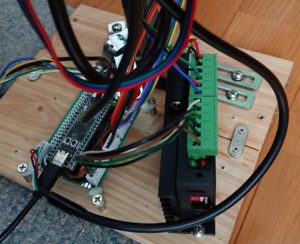
CURE(キュア) 安定化電源 スイッチング電源 AC DC コンバーター 24V 10A 240W 超薄型 直流電源変換器 過負荷保護 自動冷却 日本語説明書付 安全保護回路 自動リセット可能 電源装置
https://www.amazon.co.jp/gp/product/B08LP5H8Q9/ref=ppx_yo_dt_b_asin_title_o05_s00?ie=UTF8&psc=1
3000円程度ですが、本体の値段を考えると痛い出費です。

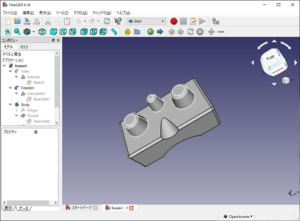
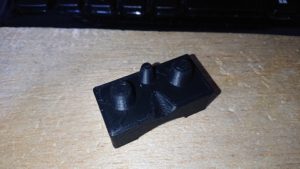
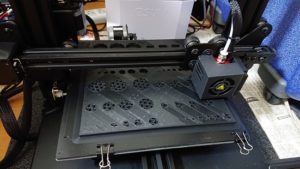
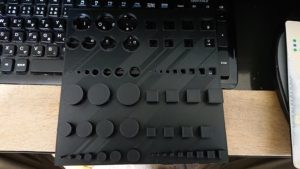
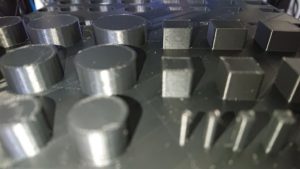
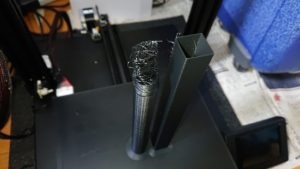
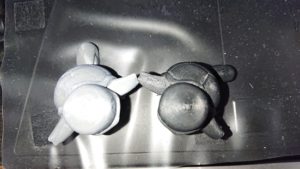
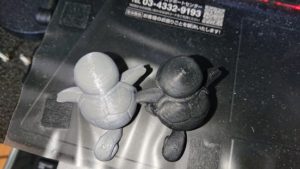
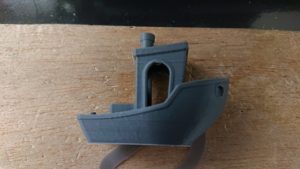
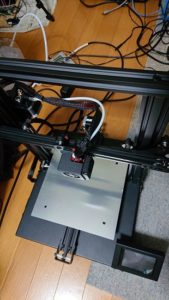
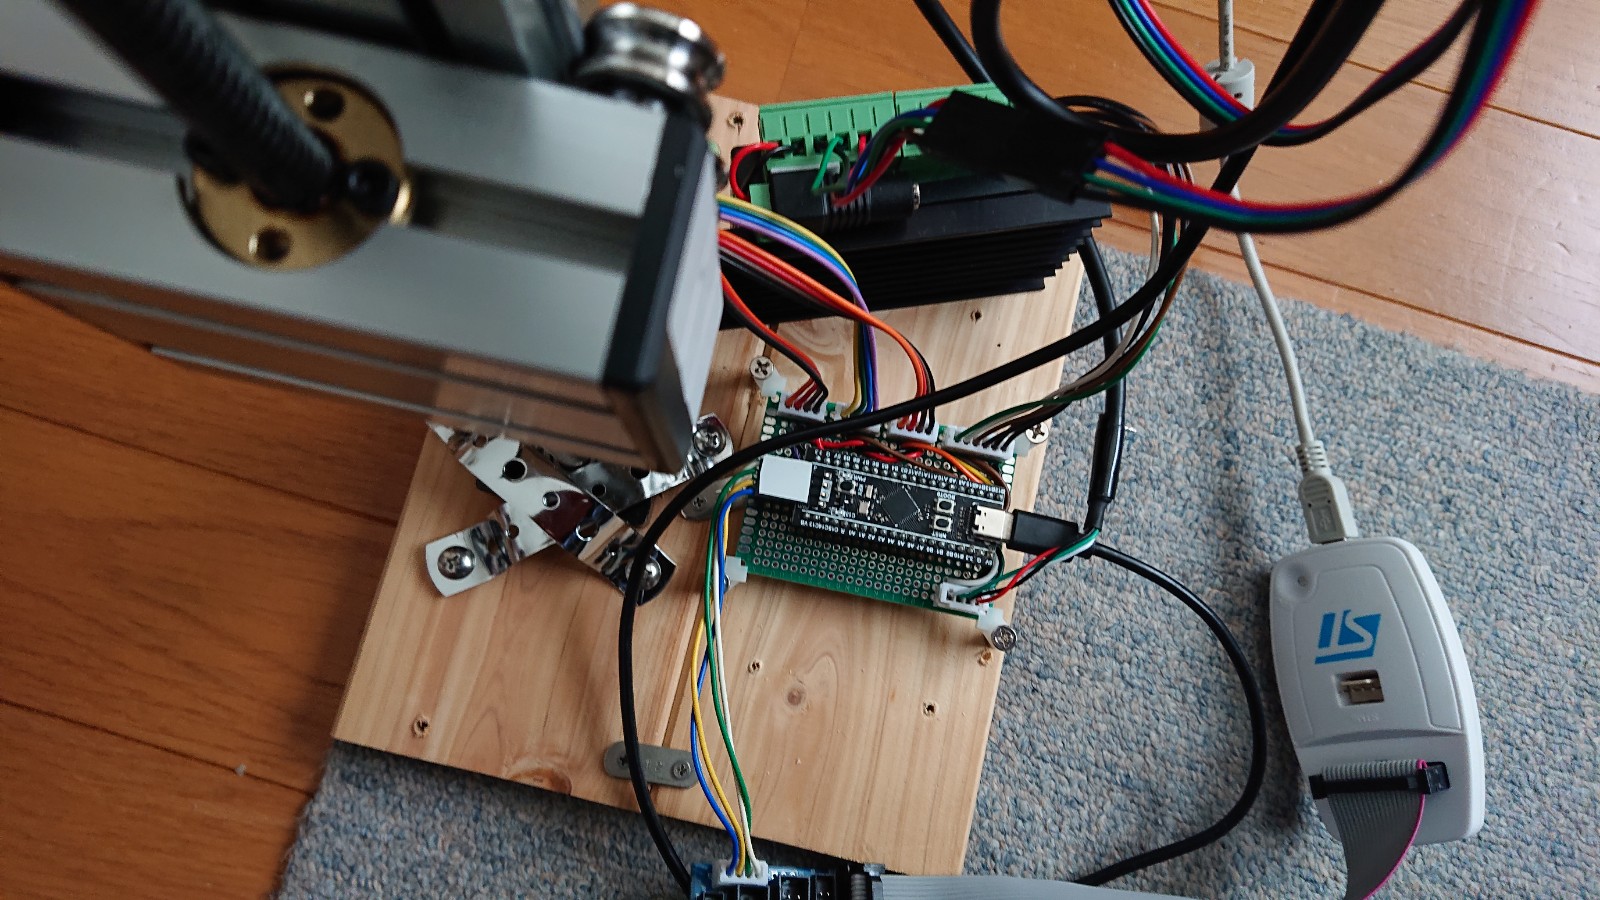
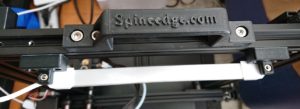
3D Printerのプチアップグレードを行いました。スクレーパホルダー、LED照明とZロッドベアリングホルダー、を追加しました。部品は、もちろん、3Dプリンタで作成しています。
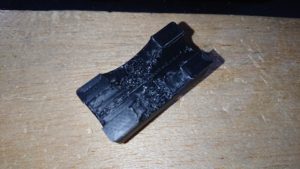
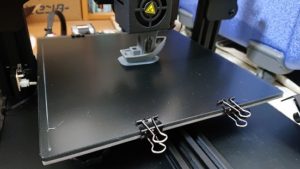
スクレーパを置く場所がなかったので設置しました。

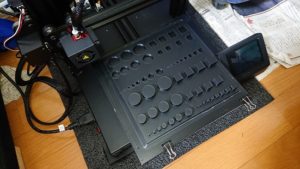
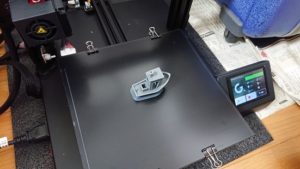
LED照明は、プラットフォームが暗いので付けました。
ルートアール 12灯 USB LED バーライト スイッチ付き 昼光色 RL-BAR12D
https://www.amazon.co.jp/gp/product/B075V5R4HC/ref=ppx_yo_dt_b_asin_title_o06_s00?ie=UTF8&psc=1

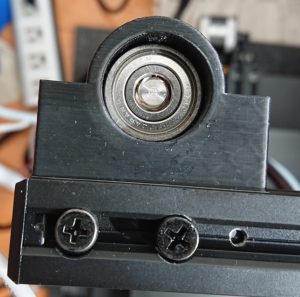
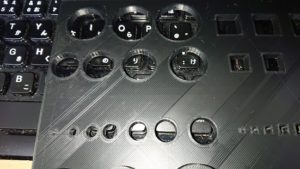
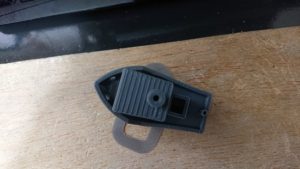
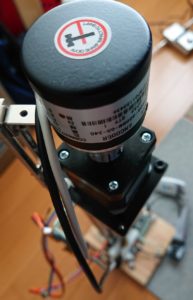
Creasee CS-20には、Zロッドベアリングホルダーがついていますが、ベアリングがついていませんでした。
ベアリングは持っていた608Zを使用しました。

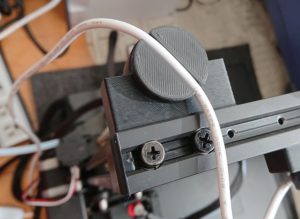
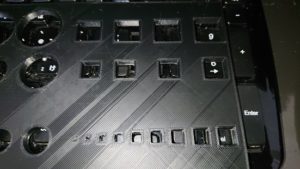
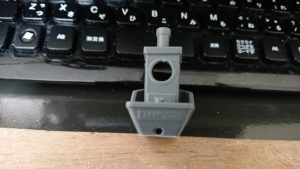
キャップも作りました。LED照明のケーブルホルダーも兼ねています。

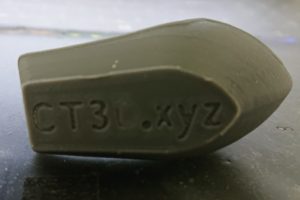
取っても追加しました。格好良くなりました。

I replaced the power supply and the 3D Printer was restored.
I used it with the following power supplies.
CURE Stabilized power supply Switching power supply AC DC converter 24V 10A 240W Ultra-thin DC power supply converter Overload protection Automatic cooling With Japanese manual Safety protection circuit Automatic resettable power supply
https://www.amazon.co.jp/gp/product/B08LP5H8Q9/ref=ppx_yo_dt_b_asin_title_o05_s00?ie=UTF8&psc=1
It’s about 3000 yen, but it’s a painful expense considering the price of the main unit.
We have made a small upgrade to the 3D Printer. Added scraper holder, LED lighting and Z rod bearing holder. Of course, the parts are created with a 3D printer.
I installed it because there was no place to put the scraper.
I added LED lighting because the platform is dark.
Root Earl 12 lights USB LED bar light with switch Daylight color RL-BAR12D
https://www.amazon.co.jp/gp/product/B075V5R4HC/ref=ppx_yo_dt_b_asin_title_o06_s00?ie=UTF8&psc=1
The Creasee CS-20 had a Z rod bearing holder, but no bearings.
I used the 608Z bearing I had.
I also made a cap. It also serves as a cable holder for LED lighting.
I added it even if I took it. It looks better.

我更换了电源,并恢复了3D打印机。 我将其与以下电源一起使用。 CURE稳定电源开关电源AC DC转换器24V 10A 240W超薄DC电源转换器过载保护自动冷却带日文手册安全保护电路自动复位电源装置
https://www.amazon.co.jp/gp/product/B08LP5H8Q9/ref=ppx_yo_dt_b_asin_title_o05_s00?ie=UTF8&psc=1
大约3000日元,但是考虑到主机的价格,这是一个痛苦的支出。 我们对3D打印机进行了小规模升级。增加了刮刀架,LED照明和Z杆轴承架。当然,零件是使用3D打印机创建的。 我安装它是因为没有地方放置刮板。 我添加了LED照明,因为平台是黑暗的。 根伯爵12灯USB LED条形灯带开关日光色RL-BAR12D
https://www.amazon.co.jp/gp/product/B075V5R4HC/ref=ppx_yo_dt_b_asin_title_o06_s00?ie=UTF8&psc=1
Creasee CS-20具有Z杆轴承座,但没有轴承。 我使用的轴承是608Z。 我也做了一个上限。它还可用作LED照明的电缆固定器。 即使添加了它,我也添加了它。看起来更好。

3D Printer5

オリジナルのモデルを作成しました。ちょうど髭剃りの置台がなかったので作成しました。
設計は、FreeCADで行いました。無償で使用できるFreewareの3D CADです。

柄を円錐で抑える設計です。

サポートがついていた面はあまりきれいではありません。

髭剃りを乗せた状態です。案外、ピッタリ合いまいた。

次の印刷を行ったとき、途中で停止しました。電源が壊れました。

NTCサーミスタが破損していました。

通常使用の発熱で破損するのか?長時間使用に耐えられなかったらしい。とりあえず、同サイズで手にはいる電源を手配しました。

I created an original model. I created it because I didn’t have a shaving stand. The design was done in FreeCAD. Freeware 3D CAD that can be used free of charge. It is designed to hold the handle with a cone. The surface with the support is not very clean. It is in a state with a shave. Unexpectedly, it fits perfectly. When I made the next print, it stopped halfway. The power supply is broken. The NTC thermistor was damaged. Will it be damaged by the heat generated during normal use? It seems that it couldn’t withstand long-term use. For the time being, I arranged for a power supply of the same size that I could get.

我创建了一个原始模型。 我创建它是因为我没有剃须刀架。 设计是使用FreeCAD完成的。 可以免费使用的免费3D CAD软件。 它设计为用圆锥形握住手柄。 带支撑的表面不是很干净。 它处于刮胡子的状态。 出乎意料的是,它非常适合。 当我进行下一张打印时,它停止了一半。 电源损坏。 NTC热敏电阻已损坏。 正常使用过程中产生的热量会损坏它吗? 看来它不能承受长期使用。 暂时,我安排了一个可以得到的相同尺寸的电源。

3D Printer4


精度がどのくらいか確認しました。
まず、XYZ 20mm Calibration Cubeで20mmの寸法がどのくらいにできるか確認しました。モデルは以下からダウンロードしました。
https://www.thingiverse.com/thing:1278865
20mmに対して0.1mm程度の精度はありました。
次に、大きいものを印刷できるか試しました。同時に様々なサイズの円と正方形の穴と柱を作成しました。
印刷中です。

半日以上かかって印刷終わりました。
200mm×200mmの印刷ができました。200mm角までの物は印刷可能です。

柱のサイズは、ほぼ指定通りです。角柱は、角が丸まっています。1辺7mm以下の小さいサイズの角柱は丸みが目立ちます。
円柱は、半径1mmから円柱の形状を保っています。

円の穴は、直径1mm小さいサイズになっています。半径1mm以下の穴は埋まってしまします。

角穴も同様に1辺1mm小さいサイズになっています。1辺1mmの正方形の穴は埋まっています。1辺2mmの正方形の穴は形がかなり歪んでいます。

次に高さ方向の確認を行いました。直径20mmの円柱と1辺20mmの角柱を高さ200mmで印刷しました。角柱はうまく印刷できました。円柱は、上部がぐちゃぐちゃに崩壊しました。プラットフォームから土台が外れたためと思われます。細く高さがあるものは注意が必要です。
200mm×200mm×200mmまでの物は、印刷が問題なくできそうです。

I checked how accurate it was. First, I checked how much 20mm can be made with the XYZ 20mm Calibration Cube. I downloaded the model from the following.
https://www.thingiverse.com/thing:1278865

There was an accuracy of about 0.1 mm for 20 mm. Next, I tried to print a large one. At the same time, he created circle and square holes and columns of various sizes. Printing is in progress. It took more than half a day to finish printing. I was able to print 200 mm x 200 mm. Items up to 200 mm square can be printed. The size of the pillar is almost as specified. Prism has rounded corners. The roundness is noticeable on small prisms with a side of 7 mm or less. The cylinder keeps the shape of the cylinder from a radius of 1 mm. The circular hole is 1 mm smaller in diameter. Holes with a radius of 1 mm or less will be filled. The square hole is also 1 mm smaller on each side. A square hole with a side of 1 mm is filled. The square hole with a side of 2 mm is considerably distorted in shape. Next, I checked the height direction. A cylinder with a diameter of 20 mm and a prism with a side of 20 mm were printed with a height of 200 mm. The prism was printed well. The top of the cylinder collapsed in a mess. Probably because the foundation has come off the platform. Care must be taken with thin and tall items. It seems that printing can be done without problems for items up to 200 mm x 200 mm x 200 mm.

我检查了它的准确性。 首先,我检查了XYZ 20mm校准立方体可以达到20mm的程度。我从下面下载了模型。 https://www.thingiverse.com/thing:1278865
20毫米的精度约为0.1毫米。 接下来,我尝试打印一个大的。同时,他创建了各种大小的圆孔和方孔以及圆柱。 打印正在进行中。 完成打印耗时超过半天。 我能够打印200毫米x 200毫米。可以打印最大200平方毫米的项目。 支柱的大小几乎是指定的。方柱有圆角。在侧面小于等于7毫米的小方柱上,圆度很明显。 圆柱体从1毫米的半径处保持圆柱体的形状。 圆形孔的直径小1毫米。半径为1毫米或更小的孔将被填充。 方孔的每一侧也要小1毫米。填充一个侧面为1毫米的方孔。侧面为2毫米的方孔的形状明显变形。 接下来,我检查了高度方向。直径为20 mm的列和侧面为20 mm的方柱以200 mm的高度打印。方柱打印得很好。列的顶部一片混乱。可能是因为基础不在平台上。必须注意轻薄物品。 对于200 mm x 200 mm x 200 mm的物品,似乎可以毫无问题地进行打印。

3D Printer3

試しにポケモンを印刷してみました。
モデルは下記のサイトからダウンロードさせてもらいました。
https://pinshape.com/items/102509-3d-printed-squirtlepokemon

まずは、標準設定で印刷しました。

サポート材を外しました。

高さ4cmに縮小して印刷しました。モデルのおかげでそれなりの出来です。

高品質の設定で印刷してみました。黒い方が高品質です。

Z軸の積層が細かいのがわかります。確かに標準設定よりきれいですが、時間がかかります。また、FDM方式なので積層感は残ります。フィギュアを作るのが目的ではないので、高品質は使わないと思います。

I tried printing Pokemon. I downloaded the model from the following site.
https://pinshape.com/items/102509-3d-printed-squirtlepokemon
First, I printed with the standard settings. I removed the support material.
I reduced it to a height of 4 cm and printed it. Thanks to the model, it’s a decent result.
I tried printing with high quality settings. The black one is of higher quality. You can see that the Z-axis stacking is fine. It’s certainly cleaner than the standard setting, but it takes longer. Also, because it is an FDM method, a feeling of stacking remains. I don’t think high quality is used because the purpose is not to make figures.

我尝试打印神奇宝贝。 我从以下站点下载了该模型。
https://pinshape.com/items/102509-3d-printed-squirtlepokemon
首先,我打印了标准设置。 我删除了支撑材料。
我将其缩小到4厘米的高度并打印出来。 得益于该模型,这是一个不错的结果。
我尝试使用高质量设置进行打印。 黑色的质量更高。 您会看到Z轴堆叠很好。 它肯定比标准设置干净,但是需要更长的时间。 此外,由于它是FDM方法,因此会留下堆叠感。 我认为我不会使用高质量,因为这不是制作数字的目的。

3D Printer2

印刷してみました。まずは、3Dベンチマークモデルです。
https://www.thingiverse.com/thing:763622
#3DBenchyのボートのモデルです。
まずレベル合わせで苦労しました。4角を合わせても、真ん中がスカスカになり材料がつきません。真ん中をきちんと合わせてもベースの熱伸びで合わなくなりました。一度熱くしてから真ん中のレベルを合わせてうまくいくようになりました。
それでも土台なしでは、密着せず、土台は付けています。

完成しました。

以下、出来映えです。印刷精度は、standardでG-CODEを作成しています。

オーバーハングは、まあまあです。

円は、まあまあです。

後ろの文字は、この精度では読めません。梁や窓は、ダレが見られます。

底の文字は、きれいですが、Dだけは、土台と混じってつぶれています。総合的に、印刷精度は、2万円以下の3Dプリンタとしては、良い方だと思います。

I tried to print it. First is the 3D benchmark model.
https://www.thingiverse.com/thing:763622
# 3D Benchy boat model.
First of all, I had a hard time adjusting the level. Even if you put the four corners together, the center will be squishy and the material will not stick. Even if the center is properly aligned, it does not fit due to the heat expansion of the base. After heating it once, I adjusted the level in the middle and it worked.
Even so, without the base, it does not adhere and the base is attached.
It was completed.
Below is the workmanship. The print accuracy is standard and G-CODE is created.
The overhang is ok.
The circle is ok.
The trailing character cannot be read with this precision. The beams and windows can be seen to sag.
The letters on the bottom are beautiful, but only D is crushed mixed with the base. Overall, I think that the printing accuracy is good for a 3D printer of 20,000 yen or less.

我试图打印它。首先是3D基准模型。
https://www.thingiverse.com/thing:763622
#3Denchy船模。
首先,我很难调整音量。即使将四个角放在一起,中心也将很粘,材料也不会粘住。即使中心正确对齐,由于基座的热膨胀,中心也不适合。加热一次后,我调整了中间的水平,它开始工作了。
即使这样,如果没有基座,它也不会粘附并且基座已连接。
完成了。
下面是做工。打印精度是标准的,并创建了G代码。
悬垂还可以。
圈子还可以。
不能以这种精度读取其后面的字符。可以看到梁和窗户下垂。
底部的字母很漂亮,但只有D被压碎与底部混合。总体而言,我认为2万日元以下的3D打印机的打印精度不错。

3D PRINTER

3D Printerを購入してみました。
まずますの精度で、とりあえず、安いものを探しました。手間は省きたかったので、光造形でなくFDMを選択しました。
Ender3系で1番安かったCreasee CS-20を選択しました。aliexpressで購入しました。約16,000円で本体のみ、購入しました。
https://ja.aliexpress.com/item/1005001714769516.html?spm=a2g0s.9042311.0.0.29944c4djL4tXr
フィラメント保管のケースも別途購入しています。
https://jp.banggood.com/ESUN-Filament-Box-Filament-Storage-Holder-Keeping-Filament-Dry-Measuring-Filament-Weight-for-3D-Printer-Printing-p-1757578.html?rmmds=category&ID=47757&cur_warehouse=CN
フィラメントは、以下のグレーの物を選択。理由は、安い中で評価が高かったからです。色は、出来映えの評価がしやすい色と思い灰色を選択しています。
https://www.amazon.co.jp/gp/product/B08DG5DZMZ/ref=ppx_yo_dt_b_asin_title_o00_s00?ie=UTF8&psc=1


注文から10日ほどで到着、梱包に問題はありません。
しっかり保護されています。
Z軸とLCDを組み立て、配線するだけです。取説はありません。3Dプリンタの構造がわかっていれば、組立はむずかしくありません。YoutubeやEnder3系の取説を探せば何とかなります。

ただ、X軸ががたがたでした。Vスロットの下側の車輪を止める金具部分が曲がっていました。車輪外して金具のお曲がりを修正したところがたつきはなくなりました。中華通販あるあるだと思います。この程度で済んでよかったです。そのほか問題はありません。ネジの予備は各一本ついています。SDカード、SDカードリーダ、ニッパ―、ヘラなど、必要なものはすべてそろっています。


I ordered a 3D printer. I chose the display FDM for stereolithography because it saved me a lot of work. I chose the cheapest Creasee CS-20 in the Ender3 series. I bought it on “aliexpress”. It is about 16,000 yen.
https://ja.aliexpress.com/item/1005001714769516.html?spm=a2g0s.9042311.0.0.29944c4djL4tXr
A filament storage case is also purchased separately.
https://jp.banggood.com/ESUN-Filament-Box-Filament-Storage-Holder-Keeping-Filament-Dry-Measuring-Filament-Weight-for-3D-Printer-Printing-p-1757578.html?rmmds=category&ID=47757&cur_warehouse=CN
Select the following gray filaments. The reason is that it was highly evaluated while it was cheap. For the color, I chose gray because I think it is easy to evaluate the workmanship.
https://www.amazon.co.jp/gp/product/B08DG5DZMZ/ref=ppx_yo_dt_b_asin_title_o00_s00?ie=UTF8&psc=1
It arrives in about 10 days from the order, and there is no problem with packing. It is well protected.
All you have to do is assemble and wire the Z-axis and LCD. There is no instruction manual. If you know the structure of your 3D printer, it’s not difficult to assemble. If you look for Youtube or Ender3 series manuals, it’s pretty good. However, the X-axis was rattling. The metal part that stops the wheel on the lower side of the V slot was bent. The rattling disappeared when the wheels were removed and the bending of the metal fittings was corrected. I think it is common in Chinese mail order. I’m glad I’m done with this level. There is no other problem. There is one spare screw for each. We have everything you need, such as SD cards, SD card readers, nippers, and spatulas.


我订购了3D打印机。 由于节省了时间和精力,因此我选择了用于光学建模的显示FDM。 我选择了Ender3系列中最便宜的Creasee CS-20。 我在“ aliexpress”购买了它。 大约是16,000日元。
https://ja.aliexpress.com/item/1005001714769516.html?spm=a2g0s.9042311.0.0.29944c4djL4tXr
灯丝存储盒也需要单独购买。
https://jp.banggood.com/ESUN-Filament-Box-Filament-Storage-Holder-Keeping-Filament-Dry-Measuring-Filament-Weight-for-3D-Printer-Printing-p-1757578.html?rmmds=category&ID=47757&cur_warehouse=CN
选择以下灰色细丝。 原因是它很便宜,但受到了高度评​​价。 对于颜色,我选择了灰色,因为我认为很容易评估工艺。
https://www.amazon.co.jp/gp/product/B08DG5DZMZ/ref=ppx_yo_dt_b_asin_title_o00_s00?ie=UTF8&psc=1
它从订单开始约有10天到达,并且包装没有问题。 它受到很好的保护
您要做的就是组装Z轴和LCD并为其接线。 没有说明手册。如果您知道3D打印机的结构,则组装并不困难。 如果您正在寻找Youtube或Ender3系列手册,那就很好了。 但是,X轴嘎嘎作响。 使V形槽下侧的车轮停止的金属部分弯曲。 拆下车轮并校正金属配件的弯曲后,咔嗒声消失了。我认为这在中文邮购中很常见。 我很高兴我完成了这个水平。 没有其他问题。 每个都有一个备用螺丝。 我们拥有您需要的一切,例如SD卡,SD卡读卡器,钳子和刮铲。

Run the linear actuator with STM32F

ステッピングモータの制御を試作するためにリニアアクチュエータを購入しました。
リニアスライドレール、アルミ合金0808ボールねじ57モーター付き単軸台形(500mm)
https://www.amazon.co.jp/gp/product/B081B4BFYP/ref=ppx_yo_dt_b_asin_title_o01_s00?ie=UTF8&psc=1
実物は、ボールねじではりません。台形ねじです。500mmという大型ですが格安なので購入しました。

ドライバは、以下を購入しました。
Quimat 4A TB6600 ステッピング モーター ドライバー コントローラー 9V-40V CNC単軸 2位相4位相(4/6/8線) 駆動工具 ドライバー QD07
https://www.amazon.co.jp/gp/product/B06XSBB45M/ref=ppx_yo_dt_b_asin_title_o01_s00?ie=UTF8&psc=1

モータは、ロータリーエンコーダを接続するためにデュアルシャフトの物に交換しています。
HANPOSE 17HS8401S-D150Sダブルシャフト48mm Nema 17ステッピングモーター42モーター42BYGH 1.8A 52N.cm 4線式3DプリンターCNCレーザー
https://jp.banggood.com/HANPOSE-17HS8401S-D150S-Double-Shaft-48mm-Nema-17-Stepper-Motor-42-Motor-42BYGH-1_8A-52N_cm-4-lead-for-3D-Printer-CNC-Laser-p-1415966.html?rmmds=myorder&cur_warehouse=CN

アクチュエータのリミットセンサとして反射型の光電センサを使用しました。
HiLetgo 10pcs TCRT5000赤外線反射センサーIR光電スイッチバリアライン障害物回避モジュールトレースセンサートレースモジュール
https://www.amazon.co.jp/gp/product/B07WR9JP3W/ref=ppx_yo_dt_b_asin_title_o07_s00?ie=UTF8&psc=1
センサーは、上側リミット、下側リミット、原点近傍の3個を使用しました。

制御には、STM32F401CCU6を使用しました。
STM32F401開発ボードSTM32F401CCU6 STM32F4学習ボード
https://jp.banggood.com/STM32F401-Development-Board-STM32F401CCU6-STM32F4-Learning-Board-p-1568897.html?rmmds=myorder&cur_warehouse=CN


I bought a linear actuator to make a prototype control of a stepping motor.
Linear slide rail, aluminum alloy 0808 Ball screw 57 Single shaft trapezoid with motor (500 mm)

https://www.amazon.co.jp/gp/product/B081B4BFYP/ref=ppx_yo_dt_b_asin_title_o01_s00?ie=UTF8&psc=1
The real thing is not a ball screw. It is a trapezoidal screw. I bought it because it is a large size of 500mm but it is cheap.
The driver purchased the following:
Quimat 4A TB6600 Stepping Motor Driver Controller 9V-40V CNC Single Axis 2 Phase 4 Phase (4/6/8 Wire) Drive Tool Driver QD07

https://www.amazon.co.jp/gp/product/B06XSBB45M/ref=ppx_yo_dt_b_asin_title_o01_s00?ie=UTF8&psc=1
The motor is replaced with a dual shaft one to connect the rotary encoder.
HANPOSE 17HS8401S-D150S Double Shaft 48mm Nema 17 Stepping Motor 42 Motor 42BYGH 1.8A 52N.cm 4-Wire 3D Printer CNC Laser

https://jp.banggood.com/HANPOSE-17HS8401S-D150S-Double-Shaft-48mm-Nema-17-Stepper-Motor-42-Motor-42BYGH-1_8A-52N_cm-4-lead-for-3D-Printer-CNC-Laser-p-1415966.html?rmmds=myorder&cur_warehouse=CN
A reflective photoelectric sensor was used as the limit sensor of the actuator.
HiLetgo 10pcs TCRT5000 Infrared Reflection Sensor IR Photoelectric Switch Barrier Line Obstacle Avoidance Module Trace Sensor Trace Module

https://www.amazon.co.jp/gp/product/B07WR9JP3W/ref=ppx_yo_dt_b_asin_title_o07_s00?ie=UTF8&psc=1
Three sensors were used: the upper limit, the lower limit, and the vicinity of the origin.
STM32F401CCU6 was used for control.
STM32F401 development board STM32F401CCU6 STM32F4 learning board

https://jp.banggood.com/STM32F401-Development-Board-STM32F401CCU6-STM32F4-Learning-Board-p-1568897.html?rmmds=myorder&cur_warehouse=CN


我购买了线性执行器,以对步进电动机的控制进行原型设计。
线性滑轨,铝合金0808滚珠丝杠57带电机的单轴梯形(500mm)

https://www.amazon.co.jp/gp/product/B081B4BFYP/ref=ppx_yo_dt_b_asin_title_o01_s00?ie=UTF8&psc=1
真正的东西不是滚珠丝杠。 这是一个梯形螺钉。 我买了它是因为它最大可达500毫米,但价格便宜。
驱动程序购买了以下内容:
Quimat 4A TB6600步进电机驱动器控制器9V-40V CNC单轴2相4相(4/6/8线)驱动工具驱动器QD07

https://www.amazon.co.jp/gp/product/B06XSBB45M/ref=ppx_yo_dt_b_asin_title_o01_s00?ie=UTF8&psc=1
用双轴马达代替电动机来连接旋转编码器。
HANPOSE 17HS8401S-D150S双轴48mm Nema 17步进电机42电机42BYGH 1.8A 52N.cm 4线3D打印机CNC激光

https://jp.banggood.com/HANPOSE-17HS8401S-D150S-Double-Shaft-48mm-Nema-17-Stepper-Motor-42-Motor-42BYGH-1_8A-52N_cm-4-lead-for-3D-Printer-CNC-Laser-p-1415966.html?rmmds=myorder&cur_warehouse=CN
反射型光电传感器用作致动器的极限传感器。
HiLetgo 10pcs TCRT5000红外反射传感器红外光电开关障碍物避障模块跟踪传感器跟踪模块

https://www.amazon.co.jp/gp/product/B07WR9JP3W/ref=ppx_yo_dt_b_asin_title_o07_s00?ie=UTF8&psc=1
使用了三个传感器:上限,下限和原点附近。
STM32F401CCU6用于控制。
STM32F401开发板STM32F401CCU6 STM32F4学习板

STM32F401開発ボードSTM32F401CCU6 STM32F4学習ボード
https://jp.banggood.com/STM32F401-Development-Board-STM32F401CCU6-STM32F4-Learning-Board-p-1568897.html?rmmds=myorder&cur_warehouse=CN

Solar charging system3

積算できるUSB簡易電圧・電流チェッカーを購入しました。
waves QC2.0 対応 USB 簡易 電圧・電流 チェッカー テスター 積算電流・通電時間計測
https://www.amazon.co.jp/gp/product/B01CLNMMRW/ref=ppx_yo_dt_b_asin_image_o01_s00?ie=UTF8&psc=1
曇りの日の1日の充電量は、16mAhだけでした。36分しか充電できていません。

晴れの日の結果です。7時から16時まで充電しました。
午後が陰ったので4時間18分充電できて431mAh充電できました。

1日に3000mAh程度は、充電したいので6倍程度たりません。検討が必要です。

Solar charging system2

充電中の電流・電圧を測ってみました。
USB簡易電圧・電流チェッカーを使用して測定しています。
薄曇りだと7~8mAくらいの電流値となりました。

晴れると20mA以上流れます。

積算ができないチェッカーなので1日でどのくらい充電できるのかわかりません。積算できるもので計測したいと思います。

Solar charging system

災害に備え、スマホが充電できる程度のシステムを作ります。
サイズは、180mm×110mm。昔買ったので薄膜ソータパネルです。8Vです。

3個DC-DC降圧コンバータ6V-32Vから3V-12Vへの調整可能な電源降圧モジュール24Vから12V 5V 3VシングルUSB電圧レギュレータ急速充電i-phone / QC2.0 / QC3.0 / DCP/FCP/AFC/SFCP/SCP https://www.amazon.co.jp/gp/product/B07PW7VSLT/ref=ppx_yo_dt_b_asin_title_o05_s00?ie=UTF8&psc=1

太陽光パネルの出力電圧をUSBの5Vに変換するモジュールです。 Amazonで購入しました。

太陽光パネルを接続すると青いLEDが発光します。

畜電用のモバイルバッテリーを用意しました。
Touching モバイルバッテリー 大容量 20000mAh PSE認証済み 急速充電対応 バッテリー モバイル 持ち運び急速充電器 iPhone/iPad/Samsung/Hua Wei/Android各種対応
https://www.amazon.co.jp/gp/product/B0833PRTPT/ref=ppx_yo_dt_b_asin_title_o02_s00?ie=UTF8&psc=1

これで、Amazonで購入しました。20000mAhと大容量ですが、1299円と格安です。 安全重視で、PSE認証済みを選択しました。

日中にモバイルバッテリーに蓄電し、夜間スマホを充電するような運用を考えています。

© 2014 Spineedge Corporation.

組込み技術向上のため、エンベデッドに関する話題中心のブログです。